Ecommerce product photography: How to take the best product photos
When it comes to making more sales online, you might feel like you’ve exhausted every ecommerce growth technique in the book, not to mention written the most compelling product descriptions possible – only to see your sales struggle to get off the ground.
It’s disheartening, right? Fortunately, there might still be one change you can make to increase conversions – the use of professional ecommerce product photographys.
In this guide, we’ll share the impact of product photography on online shoppers, along with tips and best practices for capturing product photos that sell.
Why is ecommerce product photography important?
ecommerce product photography is crucial for one reason:It allows online shoppers to get a full, accurate picture of what they will be spending their hard-earned cash on.
Unlike in brick and mortar stores where shoppers can touch, feel and get a 360-degree view of any product they’re thinking of buying, the decision to purchase online relies heavily on the product images used to convey this same information.
In fact, 93% of consumers said that images are essential in their purchasing decisions.
That’s not the only reason they’re so important though.
Excellent commercial product photography also helps with image SEO too – something that search engines are increasingly focusing on in their algorithms.
In other words, high-quality photos that are optimized for search engines stand a much better chance of ranking in relevant image searches, which in turn can drive more traffic to your product pages.
What if I’m selling through an online marketplace?
Building your ecommerce empire through an online marketplace like Amazon or eBay?
Product photos are still critical to your sales success (even if you’re private labelling your products), purely because great photos can set you apart from your competitors.
Now given that you’re likely to be competing with hundreds – if not thousands – of other merchants selling similar products through the same marketplace, differentiation really is important.
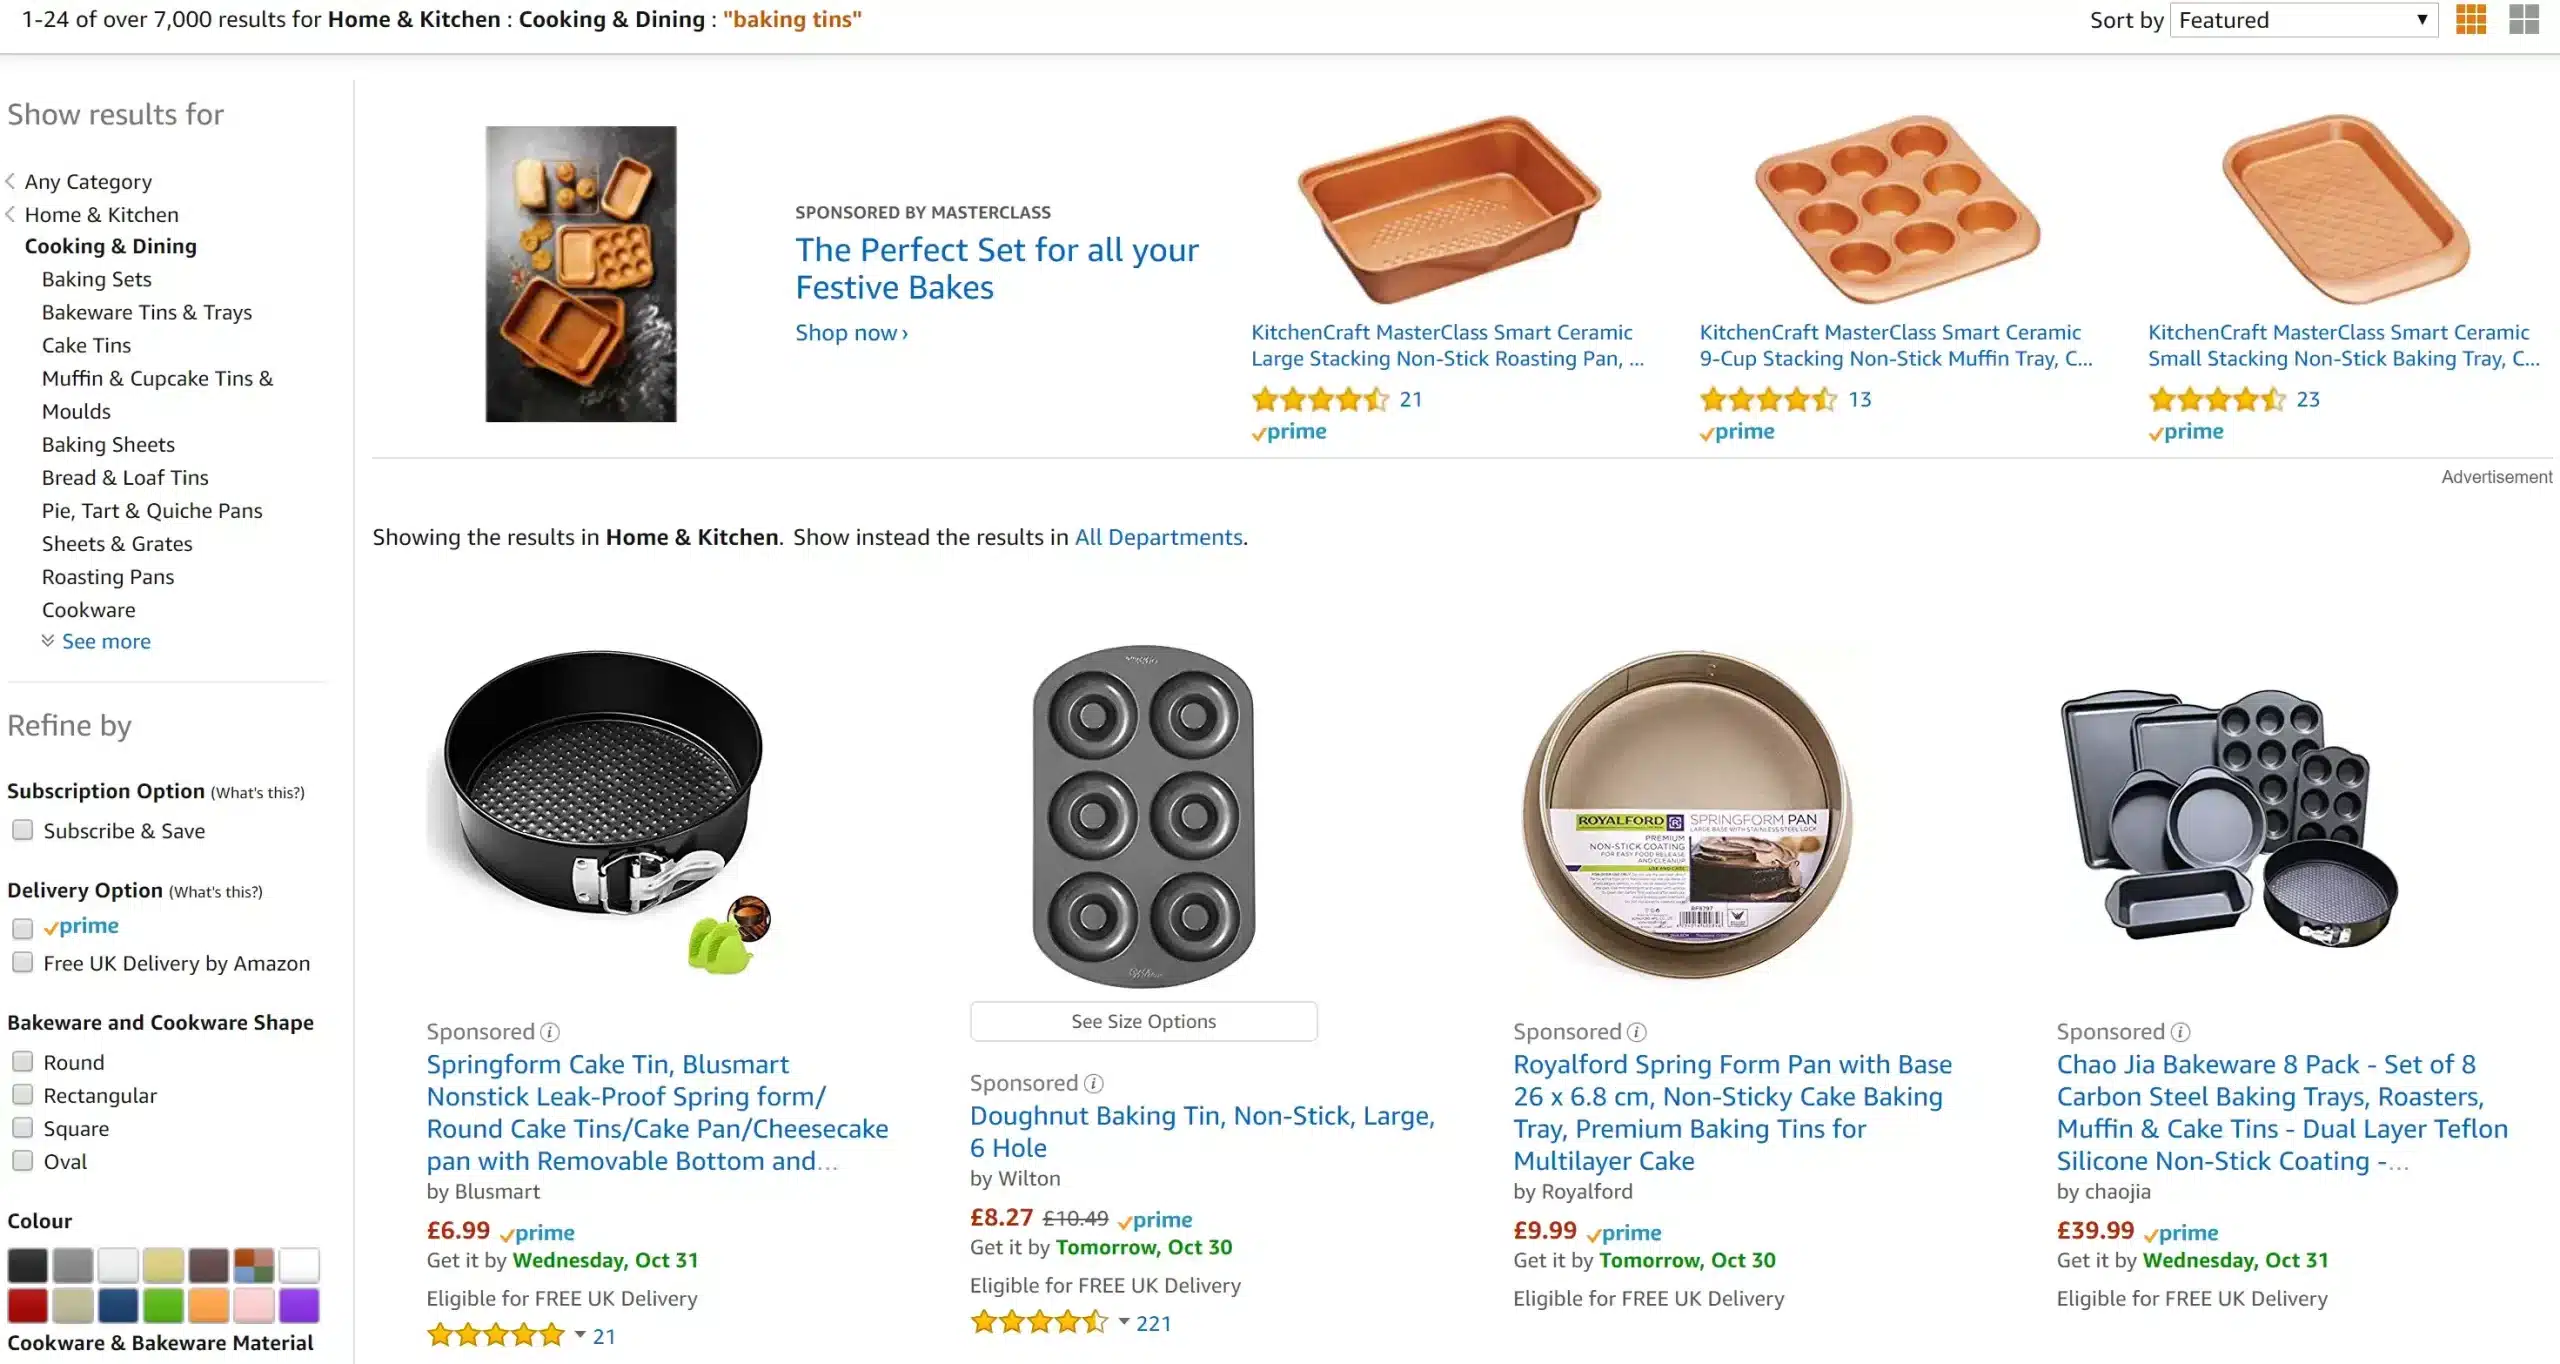
Let’s assume you sell “baking tins” on Amazon.

Image Source: Amazon
As you can see from the image above, that’s 7,000 listings on Amazon’s UK site online. If you’re using the same manufacturer supplied images as other sellers of the same product, you limit your chances of standing out and attracting customers.
Product photography tips
Ready to start taking product images that will boost your conversion rates?
Below, we have outlined seven tips for creating incredible product pictures for your ecommerce business.
1. Use high-quality images
When we talk about ecommerce product photography, we’re talking about high-quality images.
After all, the main reason for using product photos to start with is to show the item in detail. Without high-resolution images, you’ll struggle to do this.
So, what size images should you be using for your ecommerce products? The short answer is that it will depend on the platform or marketplace you’re selling on.
To help you as best as we can, we’ve listed the website image size guidelines for some of the more popular sites.
- Shopify product image size: Your Shopify images can be any size up to 4472 x 4472 pixels, or 20 megapixels. Keep in mind there’s also a maximum file size of 20 MB.
- eBay product image size: The minimum eBay picture size is 100 x 150 pixels in JPEG, and the maximum size is 1000 x 1600 pixels. For more guidance on how to take professional eBay images, have a read of this.
- Amazon product image size: Amazon image requirements specify that the pixel dimensions should be a minimum of 1,000 in height or width.
- Magento product image size: The optimal size for Magento images is 470 x 470 pixels (without zoom) or 1,100 x 1,100 pixels when enabling zoom.
- BigCommerce product image size: BigCommerce recommends that your product photos should be less than 1,000 pixels on the longest side. They should also be in either PNG or JPEG format.
- WooCommerce product image size: As WooCommerce doesn’t specify a particular image size, we would recommend that you follow general website size guidelineswhich is to have a minimum resolution of 1,366 x 768 pixels (or higher if you’re allowing customers to zoom in on products).
- Etsy product image size: For the best results, Etsy recommend that all listing photos should be a minimum of 1,000 pixels wide.
As you will notice from some of the guidelines above, certain platforms and marketplaces enable zoom functionality on product photos. If this is an option, it is something you should consider taking advantage of as it allows prospective buyers to magnify your images and get a much clearer look at he product details.
2. Use a tripod for extra balance
Even if you’re following the product photography guidelines above and are using the world’s greatest camera, it’s still possible to produce low-quality images.
How? Well, in many cases it’s because of the lack of balance from using a hand-held camera. After all, even the slightest of movements can impact image quality.
Granted, this can often be refined during the editing stage, but using a tripod for extra balance is good practice and can save you time later on, which is all the more important if you’re busy and don’t have the time or resources to heavily invest in photo editing.
Product photography equipment doesn’t have to come at a premium cost though and you can in fact pick up a camera tripod for less than £10 on Amazon, proving that you can produce great photos on a budget.
3. Where possible, take photos on a white background
There’s nothing worse than product photography that doesn’t allow your shoppers to see your product clearly. After all, it defeats the entire point, right?
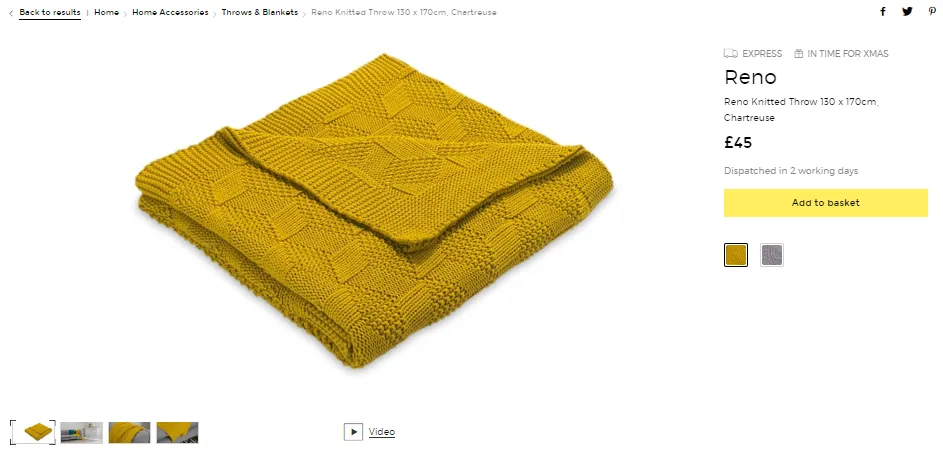
This is why it can pay to show off your products on a white background. Unlike colored or textured backgrounds, white backdrops allow your customers to see the product clearly without distraction, just like the example below.

Image Source: Made
That said, clean-cut product images aren’t the only type of ecommerce product photography you should be considering.
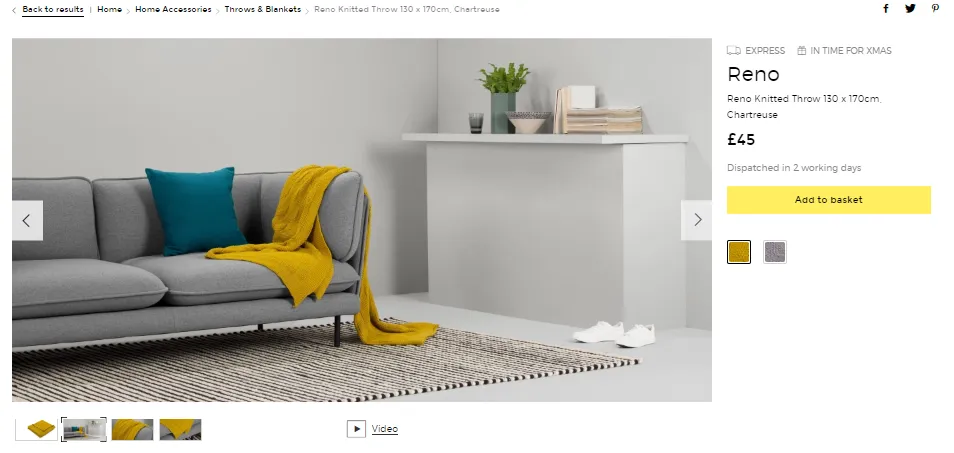
In fact, in some instances it may benefit you to take lifestyle photos that show your items in context, using a natural background.
Take furniture or homeware, for example. Having an image that shows the item in a real-life situation can help reassure potential customers of its suitability, by demonstrating the item’s dimensions and/or its intended purpose.

Image Source: Made
Depending on what it is you sell though, we would recommend that you use a combination of both, just like homeware retailer Made does.
4. Opt for bright and natural light
Where possible, you should avoid relying on overhead light bulbs when photographing your ecommerce products.
Why?
Because these lights can give off a yellowish tone, impacting the quality of your photos.
Not only that, but it also makes it incredibly difficult to convey accurate details about the product, particularly the color. In fact, getting this wrong can lead to negative customer reviews and higher return rates.
The way to avoid this is by setting up your studio near a large window or source of natural light.
Not blessed with tons of natural light in your home, office or warehouse?
Fortunately, you can achieve the same natural light effect by using softbox lights.
These portable light sources tend to be used by professional photographers, but you can pick up a decent set for less than £100 – making it a fantastic way to take high-quality photos without investing thousands of pounds into new equipment.
For more inspiration on how to build natural lighting into your product photography setup, have a watch of this video.
Another product photography tip worth noting is to avoid shadows.
In fact, we would recommend that you try to illuminate your product from all angles as natural shadows can be tricky to edit out later on.
5. Edit photos on a PC, rather than a smartphone
Now for the fun part: Editing! It really does pay to edit photos before you upload them to your site or marketplace listing, as there’s a chance these images can be improved – even if only slightly.
But how do you go about editing product images?
While there are tons of tutorials out there for using tools such as Canva, Adobe Photoshop or Fotor, the following editing techniques will be key for improving and enhancing your ecommerce product photos:
- Sharpening: Can you clearly see details on your product, such as packaging or labeling information? If not, consider using a sharpening tool to clarify.
- Brightening: Make natural lighting appear brighter, or edit the color balance from artificial lighting, using a brightening tool.
- Color correction: Are the colors in your images showing true-to-life? If not, use an editing tool to correct them.
- Remove background: If you didn’t spot a shadow that’s cropped up in your photos, use a background removal tool to remove it. Keep in mind the earlier tip about illuminating your images in advance to avoid having to deal with this when editing.
So back to the main point, why edit photos on a PC rather than a smartphone?
The answer is simple:Smartphones have much smaller screens, so no matter how good the camera is, you won’t be able to see how clear or detailed your product pictures are.
Essentially, that means you won’t have a clue how your product photography will look for website visitors who are browsing on their PC or tablet.
6. Take multiple shots of each product
Given that one of the downsides to online shopping is that prospective customers can’t view a product in the flesh, it’s all the more important that your images convey as much detail as possible.
The best way to do this?
Well, aside from image quality, another great product photography tip is to showcase the image at various angles, giving the consumer as close to a 360 degree view as possible.
This eBay listing shows it in practice.

Image Source: eBay
Notice how much more detail you can collect from those five photos of an iPhone case, as opposed to a single shot?
This is what you should be providing your customers with.
Not sure where to start?
Ideally, from the front, back, side and top, so that any potential customers get a feel for exactly what they’re buying, increasing your chances of them hitting the “buy it now” button.
What’s also worth noting about the iPhone case example is how it uses images to highlight product benefits, in this case the fact it’s shock absorbing.
With regards to your own products, think about the benefits you include in your product descriptions and consider if and how you might be able to visually communicate them.
7. Optimize your images for SEO
We’ve already touched on it, but ecommerce SEO should be a key consideration if you’re selling through your own webstore.
After all, without an already established active customer base – such as that of online marketplaces – it is your responsibility to drive traffic to your website. While there are plenty of channels you can leverage to do this – social media, email marketing, referral sites – for many businesses a great source of traffic comes directly from Google.
Now even though Google’s ranking factors give more weight to elements such as website content, URL structure and back-end meta details, image alt-tags are also taken into consideration and should therefore be optimized using your target keyword – ideally the same keyword as the product page itself.
But what exactly does image SEO do? As advanced as Google and other search engines are, they cannot interpret images, which is where alt-tags become important. Ultimately, these tags tell search engines what the image is about.
When it comes to writing them, keep the text to a minimum and refrain from keyword stuffing.
Final thoughts on ecommerce product photography
So, there you have it. A complete guide to producing incredible product pictures for your ecommerce business.
Whether you’re taking new photos to spruce up your website, Amazon or eBay product listings, or are creating entirely new product pages, remember to focus on high-quality images that show your product in the best light – literally.
Do this and you’ll soon see the impact that great photos bring, first-hand.